How can reading comprehension strategies be implemented in content-area classes?
Page 10: Preparing the Class
Mr. Dupree is now ready to group his students and to begin teaching the various roles associated with CSR. In order to do so, he needs to place his students into groups and assign their initial roles.
Grouping Students
 In general, teachers should determine group size based on how many groups they feel is a manageable number and on an estimation of their students’ abilities to work together. Although it is effective with groups of three to five students, CSR seems to work best when the number of students is limited to four. Groups larger than that tend to be noisier and less efficient. And although students who work in pairs have demonstrated academic improvement, they tend to lose the benefits of the group dynamic. Regardless of group size, CSR is more efficient when the teacher assigns students to groups rather than allowing them to select their own groups or partners.
Step 1: Rank students by achievement level (e.g., test grades, homework grades).
Step 2: Place an asterisk next to the names of those who can lead a group. (This is for initial grouping only. Remember, everyone will have an opportunity to perform every role.)
Step 3: For a group of four, select the top, bottom, and two middle students from the list. (This method can be altered for groups containing more or fewer students.) A sample group is highlighted in yellow in the roster below.
Step 4: Continue the same method until all students have been assigned.
Step 5: Review the composition of each group, making changes if necessary. (If this group does not have a Leader, as denoted by an asterisk, look at the roster to see whether there is a Leader from one of the other groups who can replace one of the existing group members or select the most likely Leader from the existing group.)
| Student Name | Grade Average |
|---|---|
| Abigail | 27 |
| Henrique | 55 |
| Katherine | 66 |
| Cody | 73 |
| Princess | 77 * |
| Jake | 79 |
| Terrence | 84 |
| Colten | 87 * |
| Raul | 88 |
| Brianna | 92 |
| Sam | 94 * |
| Lili | 97 |
In the example above, the first group does not have a Leader. It is important to remember that each student will eventually perform all of the roles; however, it is easier to begin teaching CSR when a natural leader fills this position. The teacher’s options for selecting a Leader include:
- Replacing a group member with a Leader (denoted by an asterisk) who has a comparable achievement level (e.g., Sam replaces Lili; Princess replaces Jake; Colten replaces Terrence)
- Selecting the strongest candidate among these four students who would most likely perform the role well
Click on the movie to watch Sharon Vaughn discuss mixed-ability grouping (time: 0:16).
“Copyright © by the Texas Education Agency and University of Texas at Austin. All rights reserved” on all Licensed Materials.
Transcript: Mixed-Ability Grouping
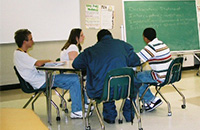
Many teachers use mixed-ability grouping as a part of their cooperative learning groups. Within these groups, they often have students who are better-performing students, and students who are average-performing students, and students who are often struggling with the text, with the information.
Addressing Classroom Management
Teachers can help their students to work cooperatively in groups by enforcing the regular behavior management plan of the classroom and by explicitly stating the rules for cooperative learning. Review the table below to learn about three of the most common problems that arise when teachers implement CSR, as well as some suggested procedures for proactively addressing them.
| Common Problems | Suggested Solutions |
| Classroom gets too noisy. |
|
| Students have unanswered questions at the end of group time. |
|
| Low-achieving students are embarrassed when unable to participate at the same level as their peers. |
|
Assigning Roles
Cooperative group roles are an important aspect of CSR because cooperative learning is most effective when every group member is assigned a meaningful task. Teachers should take care to rotate these roles on a regular basis so that every student has an opportunity to play every role. The exact number of roles that teachers assign will depend on the size of the groups and may include Leader, Clunk Expert, Gist Expert, and Announcer. Click each of the cards below to learn more about each role.


Leader Card

The Leader card has a gold border and is illustrated with a hand holding a conductor’s baton. The text reads “The Leader helps the group to use the four reading strategies (Preview, Click and Clunk, Get the Gist, and Wrap Up) and reminds each of the group members when to do his or her particular job.”
Clunk Expert Card
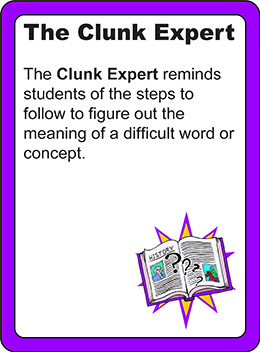
The Clunk Expert card has a purple border and is illustrated with an open history textbook and some question marks. Its text reads “The Clunk Expert reminds students of the steps to follow to figure out the meaning of a difficult word or concept.”
Gist Expert Card
The Gist Expert card has a brown border. It is illustrated with a burning light bulb. The text reads “The Gist Expert reminds the other group members of the steps to follow to figure out the main idea for each section (paragraph) of the text.”
Announcer Card
The Announcer card is trimmed red and illustrated with a microphone on a stand. The text says “The Announce calls on members to read or to share an idea. He or she makes sure that everyone takes part and that only one person talks at a time.”
Although every student should have the opportunity to experience each of the roles (including that of Leader), students should keep the same role long enough to master it before moving on to a new one. If teachers assign more than four students to a group, they can assign additional roles, such as Timekeeper and Encourager. Click each card below to learn more about these roles.
Timekeeper card

The Timekeeper card is trimmed in blue and illustrated with a stopwatch. Its text reads “The Timekeeper helps the group to complete the reading assignment within a certain amount of time.”
Encourager Card
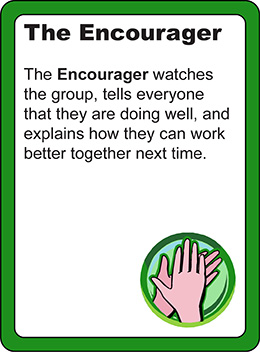
The Encourager card is trimmed in green. It is illustrated with a pair of applauding hands. The text on the card says “The Encourager watches the group, tells everyone that they are doing well, and explains how they can work better together next time.”
Click here for a printable PDF of the six role cards for use in your classroom
Though the specific instructions will vary from printer to printer, below are some general guidelines for creating your own double-sided copies.
Color Laser Printers
With most color laser printers, an option to print double-sided can be found in the Print dialog box under the Layout section.
In that same section, you will also find an option to bind either “short edge” or “long edge.” Though you won’t be binding these pages, it’s nevertheless important to select “long edge” or “Portrait,” as this will line the fronts and backs up properly.
Note: In the event that your laser printer doesn’t offer the double-print feature, please follow the rules for ink-jet printers listed below.
Ink Jet Printers
Because most commercially available inkjet printers do not print double sided, you must print the odd pages first then remove the pages, turn them over, put them back into the printer, and print the even pages.
Please be sure to check the paper orientation before placing your pages back in the printer.
Activity
 Mr. Dupree is now ready to group his students and assign roles. He has 25 students in his class. Help Mr. Dupree work through this process.
Teaching Roles
As with the CSR reading strategies, group roles should be mastered independently before students use them in cooperative groups. Although teaching these roles does take time at first, once students have learned them, they’ll be able to perform their roles independently in their assigned groups. Either of the following procedures can be used to teach the group roles:
Step 1: Pull together all of the students who are going to assume the role of Leader. Explain to them the purpose of the role and how they will interact with other students in the group.
Step 2: Review their responsibilities and model how they should implement them. It may be beneficial to give each student in the group a copy of the cue card for that respective role.
Step 3: Allow each student the opportunity to practice the role and ask other students to offer feedback.
Step 4: Continue with each “expert” group until all students know and have had an opportunity to successfully demonstrate how they would implement their roles.
Step 1: Pull together one cooperative learning group that includes students representing each role. Work with this group to develop proficiency in performing their roles.
Step 2: When the students have developed a certain level of proficiency, ask them to demonstrate to the rest of the class.
Step 3: Critique the group’s performance. Be sure to praise what was done correctly far more than you criticize what was done incorrectly.
Step 4: Rotate groups, allowing another group to perform the roles for the class while the rest of the class critiques its performance.