What should Ms. Milton consider when planning her room?
Page 6: Helping Students Navigate the Classroom
It is valuable for students with visual disabilities to have an understanding of the layout of the classroom and its furniture, as well as of the skills necessary to move about the room safely.
In order for students to fully participate within the classroom and with their peers, it is important that students with visual disabilities aren’t physically separated from their peers because of their space or equipment needs. Consultation with the students, TVI, and O&M specialist will assist in providing the information that teachers need to determine the best seating placement for students with visual impairments.
Listen as Sharon Sacks discusses how teachers can alert students with visual disabilities to classroom transitions or changes in the physical environment.
Sharon Sacks, PhD
Professor, CSU-LA Charter College of Education
Division of Special Education
(time: 0:52)

Transcript: Sharon Sacks, PhD
First of all, it’s very important that the class be organized and that there’s consistency in the organization of the classroom. Visually impaired children can’t anticipate what’s going to happen with the routine during the school day if they don’t have the visual cues to help them. Therefore, the teacher needs to make sure that the student knows what’s happening within the classroom routine. Give the student some cues for transitions. In terms of physical organization of the classroom, it’s helpful to let the student know when materials and configurations of the classroom organization might change or there’re new centers in the classroom for students to use. That really helps the student with visual impairment really become a part of the classroom milieu.
The O&M Specialist
Consult with your O&M specialist regarding what level of independent movement you should expect for any given student with a visual impairment. Many students who are blind or visually impaired will learn to move independently in a safe and efficient manner. Often, O&M specialists will come before school starts and orient the students to the classroom and teach them how to travel to other points of significance within the school environment.
The O&M specialist should approach orientation to the classroom in a systematic manner. One common method is to teach the students to explore the perimeter of the room first to establish a reference point, to label each of the walls, and to note all points of significance along each wall. Then, the O&M specialist can continue with a pattern of systematic exploration for the interior of the room.
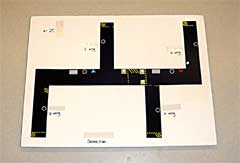
Sample tactile map of school hallway
Another method O&M specialists may use in conjunction with the above method or as an alternative approach is to create a tactile map for a student so that he or she can establish a better understanding of the “big picture” of the classroom layout and/or the school environment.
tactile map
glossary
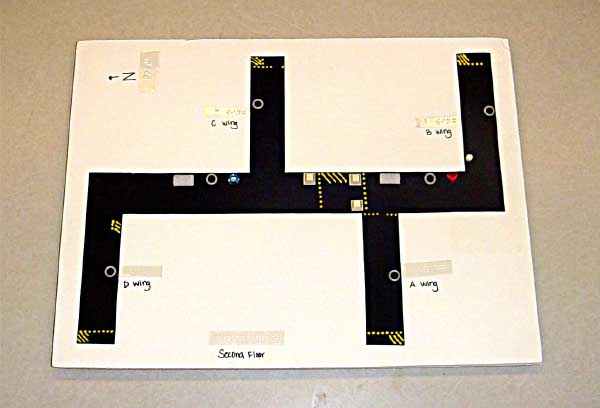
This is a sample tactile map of a school hallway. It is a white poster board with black rectangles connected to form the shape of the school. The bottom of the poster is labeled “Second Floor.” There is a north symbol in the top-left corner of the page, pointing to the left. Starting from the bottom, left-hand side of the poster there is a black, vertical rectangle labeled “D wing.” At the end of the D wing, in the middle of the page, is a long, horizontal rectangle that extends all the way to the right side of the poster. At the end of this horizontal rectangle is a protruding vertical rectangle labeled “B wing.” From the left halfway down the horizontal rectangle is a protruding vertical rectangle labeled “C wing.” Between C and B wings is a downward vertical rectangle labeled “A wing.” Throughout the hallway rectangles are yellow hash marks, gray circles, a few red rectangles, and yellow squares. Each of these symbols represents some portion of the hallway landscape. To summarize, starting from the left is D wing pointing down from the middle horizontal hallway, then C wing pointing up, A wing pointing down, and B wing pointing up.
Some commonly used techniques for safe travel are described below.
To help students establish a line of direction, the O&M specialist may teach techniques such as squaring off and aligning to walls or furniture.
squaring off
A method of positioning the body to be perpendicular to an object, wall surface, or sound to establish a perpendicular line of direction to cross an open space.
aligning
A method of positioning the side of body to be parallel to an object, wall surface, or sound to establish a parallel line of direction to cross an open space.
Squaring off
Aligning
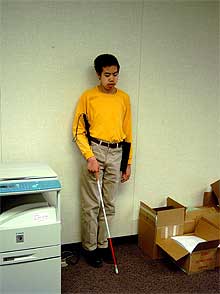
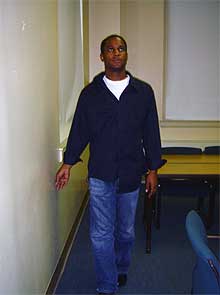
To increase safety during students’ independent movement, the O&M specialist may instruct students to use self-protective techniques, such as upper-body protective technique and lower-body protective technique.
upper-hand-and-forearm self-protective technique
A technique using one arm to protect the upper body, specifically the head and shoulders, that is often used in conjunction with trailing or with lower hand and forearm self-protective technique.
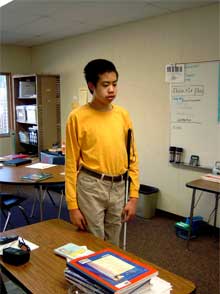
lower-hand-and-forearm self-protective technique
A technique using one arm to locate or protect oneself from objects at or around waist level; may be used in conjunction with upper-hand-and-forearm protective technique.
Upper-body protective technique
Lower-body protective technique
Another technique the O&M specialist may teach students to use is trailing to locate pertinent information or destinations.
trailing
A technique that uses one hand to maintain contact with the environment to assist in establishing a straight line of travel or to locate specific objectives along an environmental line.
Trailing
The Classroom Teacher
When the teacher needs to help students with visual impairments locate destinations within the classroom, it is important to resist the temptation to take the students by the hands or otherwise physically push, pull, or steer the students. It is beneficial for the teacher to encourage the students to move independently—at their ability level—about the classroom to conduct various activities or gather materials.
Listen as Betty Hurst, an elementary teacher in Nashville, TN, discusses her experience helping a blind student navigate the classroom.
Transcript: Betty Hurst
Well right away I found out there was some furniture in the way that was giving her a problem trying to get to the bathroom. We were able to find a way for her to put one foot on the rug, one foot off of the rug and walk to the bathroom, but of course, the rug didn’t go all the way to the bathroom so she did have to kind of feel her way. And again, you know, the children would be real good and want to help her and I would say, ‘Kayla needs to do this by herself.’ And she would find her way to the bathroom and she would learn left and right, ‘take a left once you get to the sink,’ and throughout last year she still had some difficulty knowing that type of spatial relationship – left and right was still giving her some difficulty. But I would say, ‘What are you feeling, Kayla?’ you know, ‘Are you going in the right direction?’ and she would giggle and say, ‘No, Mrs. Hurst,’ and so I’d say, ‘Turn around!’ And then she would take care of all her bathroom needs, take care of her hand washing without any assistance, and then she would find her paper towel and she could even find the trashcan without her sight. So, for the most part, there was no problem with mobility in the classroom. I don’t know of any instance where she ever bumped into a table or fell over a child. And you might think that would be a problem but usually it was never a problem.
Often, verbal directions assist students in locating materials or destinations within the classroom. When using verbal directions, it is important to use clear and precise terms to aid students’ orientation. The following are a few tips to consider when giving verbal directions.
DO USE:
Specific directions, considering students’ current levels of spatial understanding. Some examples, from simple to more complex, include:
- Directionality/laterality phrases
- The bookshelves are to your left.
- Your spoon is directly to the right of your plate.
- Positional terms, using prepositions
- The storage cabinet is next to the bookshelves.
- Evan’s desk is in between Emily’s desk and John’s desk.
- Distances
- The chalkboard is 3 feet in front of you.
- Clock-face directions
- Your water glass is placed in front of you at 1 o’clock.
- Degrees
- The bathroom door is 90 degrees to your right.
- Compass directions
- Exit the classroom through the south door.
- The teacher’s desk is in the northwest corner of the room.
AVOID:
Vague directions and physical gestures. Specific examples of what to avoid include:
- Using vague phrases such as “over there” or “right by you” or “look out!”
- These are not specific enough to provide the direction that students with blindness or other visual disabilities need.
- Pointing to objects or directions
- If you must, be sure to give clear verbal directions, too.
- Having the student count steps
- Although the general population (or perhaps just Hollywood) holds the common belief that counting steps is fundamental to the orientation of a person with a visual impairment, frequent use of counting steps between destinations is not an efficient method of developing spatial orientation.
Activity
Ms. Milton has learned a lot about Evan’s and Emily’s travel skills from the O&M specialist. Click here to test your knowledge of orientation and mobility skills.
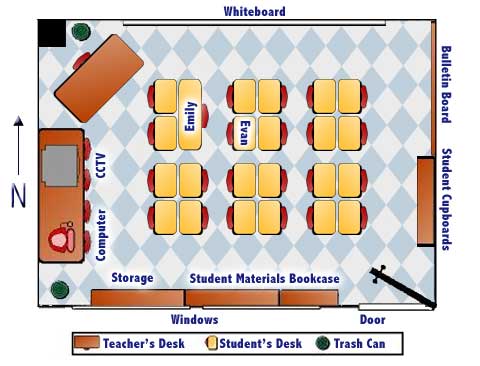
For questions 1 through 3, refer to the above picture of Ms. Milton’s classroom.
- For Evan to establish a line of direction from his desk to the computer tables, he should:
-
Incorrect. This would direct Evan toward the desk behind him.
-
Incorrect. This would direct Evan toward the student cupboards.
-
Correct! Align with his right side to the front of his desk
-
- During her O&M instruction, Emily has been practicing following directions using laterality and directionality terms. As Emily enters the room, Ms. Milton reinforces this by indicating:
-
Incorrect. This is an example of using compass terms, not laterality and directionality terms.
-
Correct! The bookcase is to your left.
-
Incorrect. This serves as an example of using positional terms, not laterality and directionality terms.
-
- Evan wishes to throw away his gum before going to his desk. Which of the following would be most appropriate when giving Evan directions to the trashcan as he enters the classroom?
-
Incorrect. Although this might get him in the vicinity of the trashcan, counting steps isn’t an accurate or efficient method for finding destinations.
-
Correct! These directions are clear and precise, and they require that Evan use the trailing technique while walking to the trashcan.
-
Incorrect. Although these directions are generally correct, they are somewhat vague and lack the specificity to ensure that Evan will be able to locate the trashcan.
-
- Ms. Milton’s best resource for getting information on Evan’s abilities for moving within the classroom and on the school campus is:
-
Incorrect. Unless the TVI also has an O&M degree, he or she would not be the person responsible for Evan’s O&M skill development.
-
Correct! Evan’s O&M specialist
-
Incorrect. This person is responsible for measuring clinical visual functioning and prescribing optical aids but not for developing Evan’s O&M skills.
-
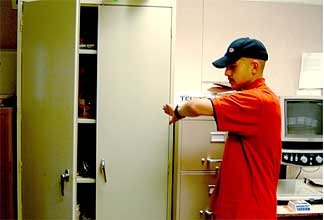
- Evan has found that his classmates sometimes leave the eye-level cabinet doors open after they get their activity materials. When walking near the cabinet doors, what technique should he use to avoid running into them?
-
Correct! Upper-body protective technique
-
Incorrect. This technique is not useful for protecting the body.
-
Incorrect. Although a protective technique, this is not very helpful for head-level obstacles.
-