What should Ms. Milton consider when creating lesson plans to ensure the inclusion of Evan and Emily?
Page 6: Instructional Methods Inside the Classroom
 Now that Ms. Milton has learned about working with the TVI to alter classroom materials for Evan and Emily, the next step is to learn how to adjust her instruction. It is important to consider how students with visual impairments will perceive the information being taught. It may be necessary for the teacher to make some minor adjustments in the instructional presentation so that students with visual disabilities will have the same opportunity to follow visually presented information.
For example, before the lesson begins, the teacher should consider the materials he or she will be presenting on the board or with an overhead and do one of the following:
- Ask the TVI to enlarge or convert the pictures, diagrams, and graphs that will be shown on the chalkboard or screen.
- Ask the TVI to convert to the appropriate reading medium the key points that will be written on the board or overhead.
Furthermore, during the lesson, the teacher should consider the suggestions below:

- Read aloud what is written (or being written) on the chalkboard and overhead projections.
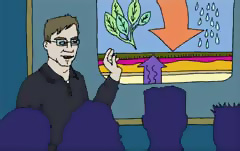
- Describe all pictures, diagrams, and graphs shown on the board or overheads.
- Invite students with low vision to reposition themselves as needed for an unobstructed, closer, or glare-free view of the chalkboard or overheads.
- Encourage students to use low-vision devices as appropriate.
For Your Information
Here are some other helpful suggestions for how to present visual materials to students with visual disabilities:
- Experiment with different combinations of high-contrast markers against the white board (or chalk against the blackboard) to aid the students’ viewing of material written on the board.
- Consider writing on flip-chart paper attached to the board so that it can later be given to students with low vision for closer inspection.
- Try repositioning the overhead projector to find the most helpful size of print projected on the screen.
Classroom Demonstrations
Teachers often use demonstrations or modeling during instruction so that students are able to watch and imitate new skills. However, as traditionally used, these instructional strategies rely heavily on students’ ability to see. Some students with low vision may be able to follow demonstrations and modeling of new skills by simply moving closer to the teacher or by using their low-vision devices as appropriate. Other students with visual impairments will require more creative teaching approaches to ensure that they are on equal ground with their sighted peers.
Below are several ideas that teachers can use to adjust instructional practices while using demonstrations and modeling:

- Describe each step of the activity in detail while doing it.
- Make the materials available for the students to explore before and after the demonstration.
- Use multi-sensory approaches that encourage students to use all of their senses in learning.
- Use hand-over-hand instruction to teach the motions of a new skill; for example, the teacher might ask a student to place his or her hands over hers as she demonstrates how to pour liquid into a test tube.
In all cases, it is a good idea to ask questions while demonstrating and/or modeling to assess students’ understanding of the content being presented.
Audio-Visual Presentations
 More and more, teachers use movies, CD-ROMS, slides, and other forms of media to present information. To make these materials equally accessible to students with visual disabilities, teachers need to describe verbally what others are seeing. It is best to start by giving a general description of what is happening in the media presentation and then provide details as time allows.
Keep in Mind
- While describing key visual points, teachers should make certain that their descriptions do not interfere with the information in the audio-visual presentation.
- Students with visual impairments may be unfamiliar with some of the concepts being described. Teachers may need to provide additional explanations and learning experiences afterward if their students are to fully understand what is being depicted in the presentation.
- Teachers may find it beneficial to ask the TVI to observe while they describe visual information in class and to offer feedback.
Activity
Describing visually presented information is a skill that takes time to master. Though it may seem difficult and unnatural at first, the more you practice, the easier it will become. Here is an opportunity to practice this skill.
Imagine that you are a fifth-grade general education social studies teacher. You are teaching your students about the history of space exploration. Identify a few key aspects of the photo to the right that would be important to describe for students with visual impairments. Then jot down how you would describe the picture.
Which concepts and details did you list as important to mention to students who have visual disabilities? Did you mention:
- That he’s wearing a bulky white space suit and helmet?
- The moon? And craters? That the moon’s surface looks like soil?
- That this is a photo of Neil Armstrong, the first man to set foot on the moon?
- That he’s standing up and facing the camera?
- That the sky is black?
- That the photo is mostly black and white, with the exception of the U.S. flag on the shoulder of the astronaut’s suit?

Photo courtesy of NASA